11 Easy Steps to Make VS-Code Friendlier (2020)
According to StackOverflow survey, VS-Code is the most popular code editor in the world. One of the reason for its popularity is its customization. In this article we will make VS-Code more Friendlier to use, with simple setting changes and best of the available plugins .


Before we start
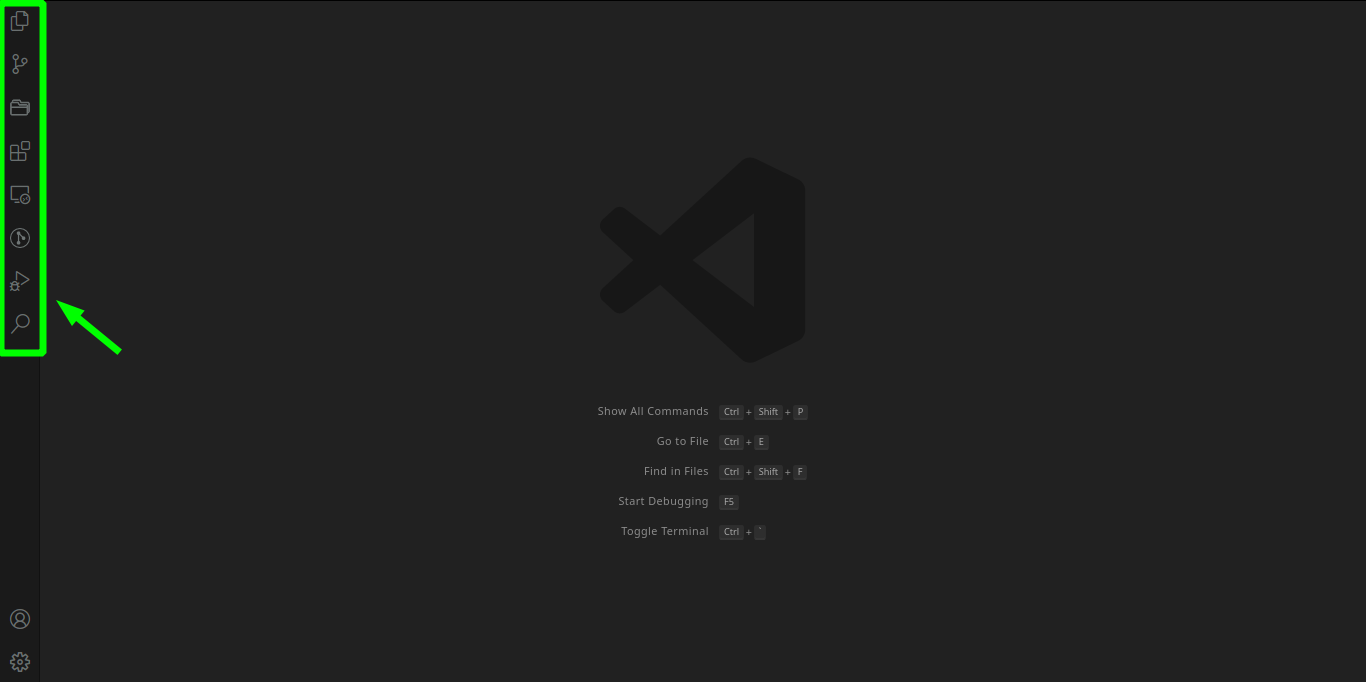
Explaining how everything works in VS-Code would fill a 600 page book. We won’t be doing that here. However, if you want to get started quick; remember the following keyboard shortcut:-
Ctrl + Shift + P
Change how you change
There are a couple of ways to change configurations:-
- Edit JSON
- Settings UI
Both are valid methods of changing/applying configurations. We will be going JSON way. JSON way to change config is not the default, so we will change that first. On VS-Code search for “settings editor”
File (or Code) > Preferences > Settings > “settings editor”
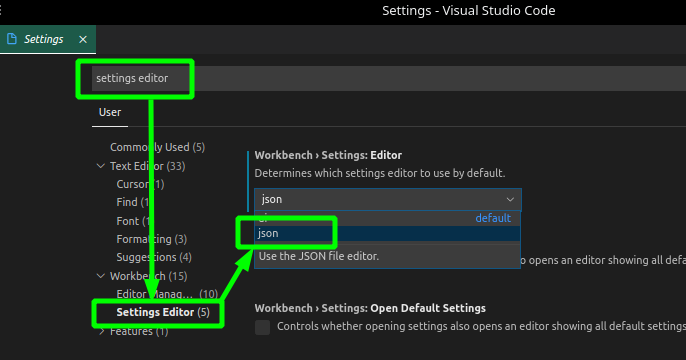
From the filtered “Categories” on left panel, select “Settings Editor”. From the drop downs under “Workbench > Settings: Editor” select “json”. That’s it. Next time you open the settings using [File (or Code) > Preferences > Settings], you’ll see a JSON file – which we will fill in with friendly stuff.
Visual Appeal
VS-Code looks good out of the box, but we can customize it to our liking using the following tricks.
1. Cool Fonts – Font Ligatures
Certain mathematical symbols are not present on our keywords. But with right kind of Font we can make them appear on screen just as they are supposed to.
For example != or -> is written as below:-

Only certain fonts allows for the above magic to happen. Most popular among them is FuraCode. Download and install it. Then proceed to make the following changes to setting JSON.
"editor.fontFamily": "'FuraCode Nerd Font'",
"editor.fontLigatures": true,
"terminal.integrated.fontFamily": "FuraCode Nerd Font",2. Smoothen Cursor Movement
Following change would make your cursor more alive more elegant; as if it has a personality of its own. It is difficult to explain or in a video – like 120Hz mobile screen refresh – but chances are you’ll like it. So give this a try.
"editor.cursorSmoothCaretAnimation": true,3. Cooler Icons
On VS-Code explorer, each file is automtically assigned icons. While default icons are decent, we can benefit from more intuitive icons.
To install the Icon theme:-
- Click on the Extensions (Ctrl + Shift + X) side bar
- Search for “Material Icon Theme”
- Select the one which is authored by “Philipp Kief”
- Click “Install”
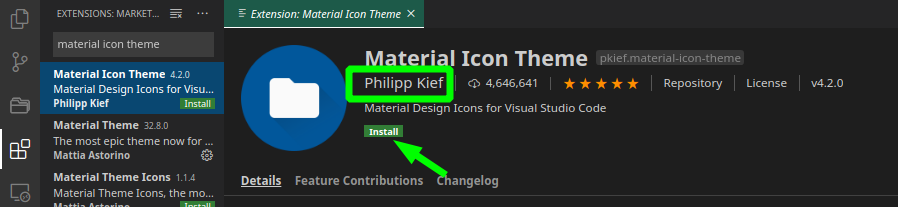
We have only installed the Icon Theme. To apply it make the following changes to setting JSON.
"workbench.iconTheme": "material-icon-theme",4. Themes
This is a very personal choice. But you can’t go wrong with the following.
Default Theme


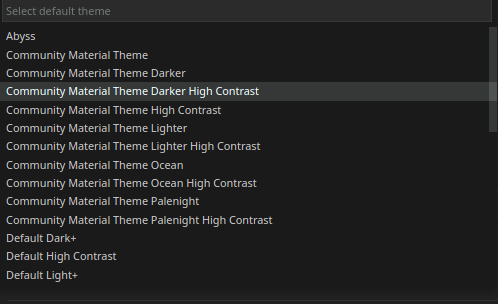
Color Theme
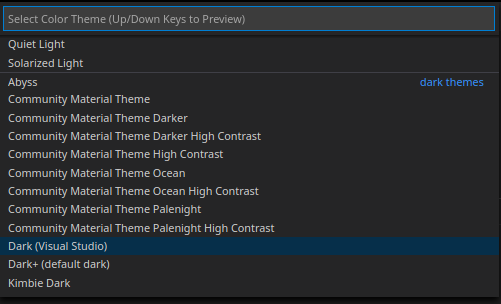
Or you can use setting JSON to apply it like below
"workbench.colorTheme": "Visual Studio Dark"Check the [Bonus] section below for a method to change the theme depending on the language you are coding.
Make Space for Code
I like my code window to have more space for the actual code. To that end, we can disable some features to make more room for code.
5. No Minimap
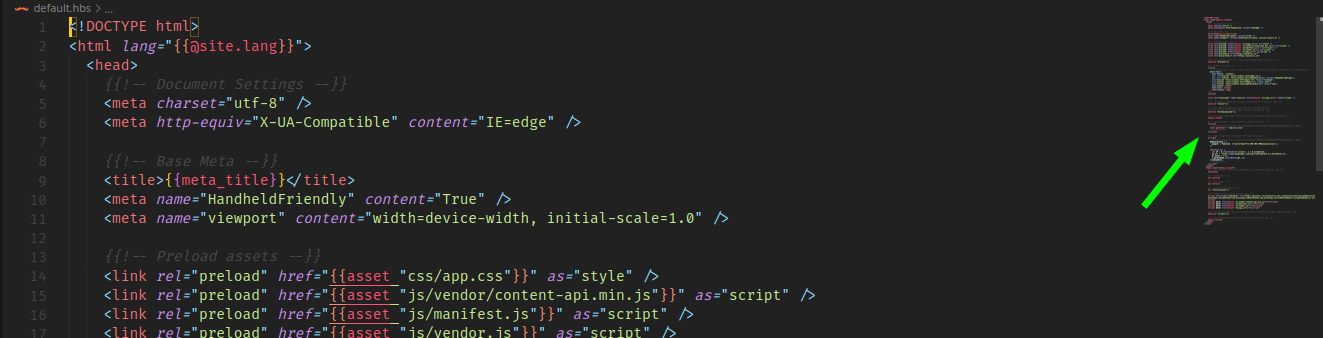
"editor.minimap.enabled": false,6. Make the Left-Bar (Activity Bar) Smaller
Useful as it is, the activity bar takes way too much space of screen real-estate. We would want it to be there but not very visible.
We do the following 3 to achieve this:-
- Zoom-out the entire application’s view.
"window.zoomLevel": -1 - Above step would make font small. Fix that by increasing the font.
"editor.fontSize": 17.4 - Keep the font-size of integrated terminal same as that of code – for consistency.
"terminal.integrated.fontSize": 17
To do that make the below changes to JSON config.
"window.zoomLevel": -1,
"editor.fontSize": 17.4,
"terminal.integrated.fontSize": 17,
Clean Code
7. Indent Guides, Format Code on Save, Trim Trailing Blank Spaces
While a good looking is desirable, it is not essential. Writing code is what we use VS-Code for. Following few setting changes would make writing code less error-prone.
editor.renderIndentGuides – Add vertical lines denoting matching indent level.
editor.formatOnSave / editor.formatOnPaste – Auto-formats code.
files.trimTrailingWhitespace – Automatically removes whitespaces from end of each line.
"editor.renderIndentGuides": true,
"editor.formatOnSave": true,
"editor.formatOnPaste": true,
"files.trimTrailingWhitespace": true,Plugins for Efficiency
Just like Atom which is the parent of VS-Code, we can install plugins to improve functionalities. In this section, we will discuss some of the best plugins you can use to improve your coding efficiency.
8. Prettier Plugin
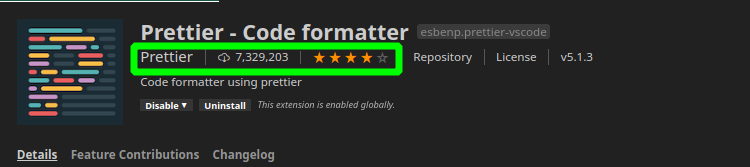
It formats JavaScript, JSON, CSS, HTML, Markdown. With the below settings we are ensure Prettier is used as default formatter.
"editor.defaultFormatter": "esbenp.prettier-vscode",
"[html]": { "editor.defaultFormatter": "esbenp.prettier-vscode" },
"[json]": { "editor.defaultFormatter": "esbenp.prettier-vscode" },9. GitLens
If you are using any Git-System as code repository, you absolutely MUST install this plugin. It pulls in a lot of information from the repository and displays right becides the code.
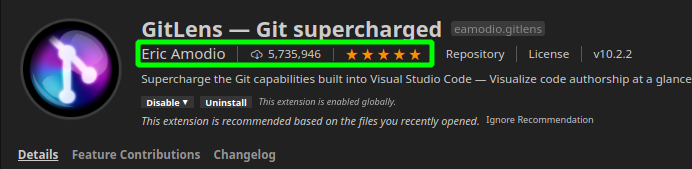
Below settings are to make GitLens less intrusive; cleaner workspace being the objective.
"gitlens.hovers.currentLine.over": "annotation",
"gitlens.advanced.telemetry.enabled": false,
"gitlens.blame.avatars": false,10. Project Manager
If you are like me, you don’t want to go to a file explorer or type in a path in terminal to open that project.
Project Manager adds a new Icon to Activity Bar. Clicking on this will let you name and save the current project. Next time you want to load that project, just click on it.

If you keep all your source-controlled code under a single directory; this plugin can list all the projects under it and clicking on any of it would load the project to current window.
"projectManager.git.baseFolders": ["/git/root/dir1/"],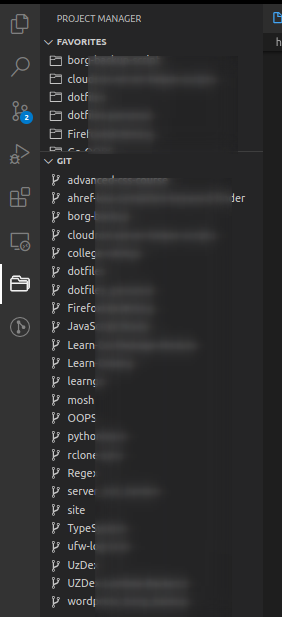
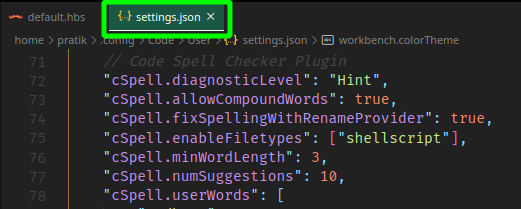
11. Code Spell Checker Plugin
More than being grammar-nazies, correctly spelt names in code can avoid a lot of confusion if you are working in a team across different continents. Also, if you write even a basic amount of documentation, you would want to have a spell checker.
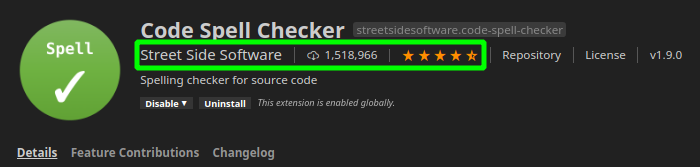
This is where this plugin comes in.
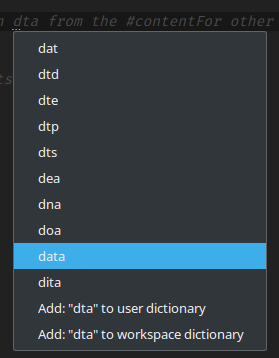
"cSpell.diagnosticLevel": "Hint" tells the plugin NOT to show spelling mistakes as error (with red squiggle), instead we just want a ... at the beggining of the word. Clicking the yellow bubble on top of the word would give a list of suggested corrections.

Plugin also allows you to add certain works to skip-list ("cSpell.userWords") which would not be vetted.
We have to manually add shellscript to supported filetypes, since it is not in the supported-list by default.
"cSpell.diagnosticLevel": "Hint",
"cSpell.allowCompoundWords": true,
"cSpell.fixSpellingWithRenameProvider": true,
"cSpell.enableFiletypes": ["shellscript"],
"cSpell.minWordLength": 3,
"cSpell.numSuggestions": 10,
"cSpell.userWords": [
	"GOPATH",
	"Jython",
	"Printf",
	"Println",
	"Sprintf",
	"Struct",
	"elif",
	"mkdir",
	"pylint",
	"subfolder",
],I perosnally love this plugin. It has made working with Markdown files a lot… frientlier.
[Bonus] – Advanced Customizations
1. Disable Telemetry
You don’t like what you don’t like – nothing to explain.
"telemetry.enableTelemetry": false,
"telemetry.enableCrashReporter": false,
"extensions.showRecommendationsOnlyOnDemand": true,2. Auto Change Theme based on Language
Cause one theme ain’t good enough.
To apply different themes to your workspace for different languages, you need to install Theme by language plugin.
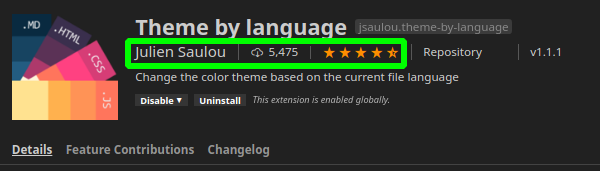
Then, add configuration like this:-
"*"for globally applying a theme."markdown"to apply the theme only when current file is a markdown.
"theme-by-language.themes": {
	"*": "Visual Studio Dark",
	"markdown": "Material Theme Darker High Contrast"
},3. Customize theme colors
You like a color-theme, but somethings are just not the way you would like.
For Example, I like the Visual Studio Dark color-theme, that comes preinstalled on VS-Code. But, I find it diffucult to distinguist between the current active tab from the rest.
So, I added the following to solve that.
"workbench.colorCustomizations": {
	"tab.activeBackground": "#07f7af3f",
	"tab.activeBorder": "#ffffff"
}"tab.activeBackground": "#07f7af3f"– Makes the active tab brighter"tab.activeBorder": "#ffffff"– Adds a white bar below the active tab
4. How to work VS-Code Settings
While changing settings through JSON is kind of tedius, VS-Code does provide a few helps.
Setting Suggestions
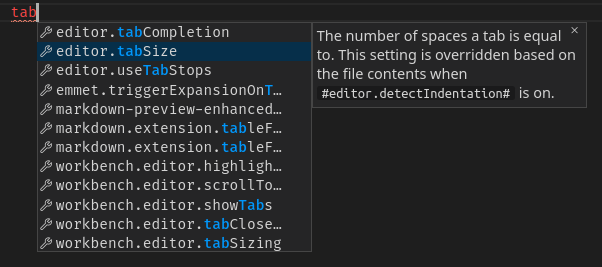
If you do not know the exact name of the config but you want to change something, just start typing what you remember of the setting, VS-Code will provide suggestions automatically.
Suppose you want change the number of white spaces printed when you click Tab. But you do not know the configration option for that. No worries - just start typing what you want to do ("tab" - in this example). VS-Code will show the appropriate setting option. Up and down the arrow keys to go through the suggestions; which also provides a detailed explanation of the setting as a popup. Press [tab] to have it written to JSON setting file.
Setting Options
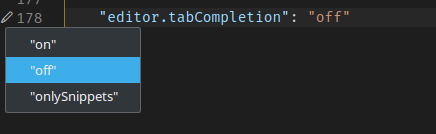
Consider this, you already have some settings and it does not work the way you like. May be another option for the setting might fix it. But, you do not know all the options for that setting.
No problems – just hover over the settings. A tiny pen would appear to the left of your editor (see below). Clicking on it would display all available options, which you can change by selecting it there.
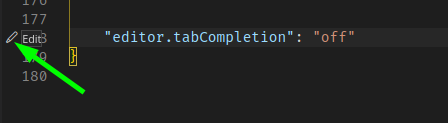
Clicking on the Edit will display all available Options for that particular settings.
Conclusion
For a free product, the amount of customizations that VS-Code provides is commendable. And still, it is easy to get started with. But to shoot your productivity through the root, spend some time learning the tool and it'll save you a lot time.
What we discussed here is just tip of the iceberg. To know more about it do check out the comprehensive (and somewhat old) tutorial on it by John Papa on Pluralsight or on youtube.
![Use your phone as a command runner on your computer [KDE Connect]](/content/images/size/w600/2021/07/maxim-ilyahov-0aRycsfH57A-unsplash.jpg)